Getting started with code signing for under $100
February 27, 2010
Update 3/15/10: Silverlight 4 supports code signing elevated trust .XAP files
I recently jumped in and acquired an Authenticode code signing certificate & key pair. It’s great being able to sign my .NET executables, installers, and even Visual Studio 2010 extensions.
I’m documenting my efforts here in the hope that others would be able to follow the relatively straightforward process – there’s not much magic other than learning to export and work with the certificate mechanisms inside Windows. But I know a lot of devs see it as a black magic art, and really it’s just about time, money, and some quick learning.
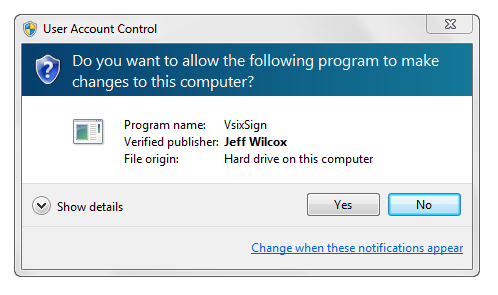
Which dialog would you click ‘Yes’ on?
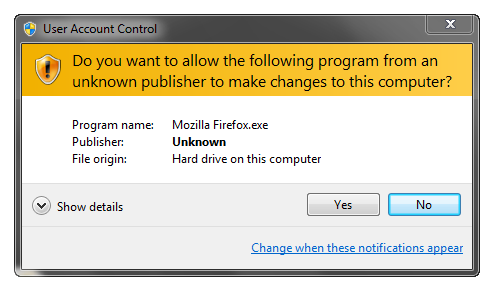
Windows 7 is leaps and bounds ahead of Vista in terms of usability. The improved User Account Control experience is nice. I think that a lot of people are finally becoming more wary of unsigned software, especially installers.
With the net full of stories of mirror servers becoming compromised, or people blinding clicking yes on many dialogs, the assurance of the dialog without the scary orange warning banner is the one I think every software developer would like to offer their customers. It’s the professional thing to do.
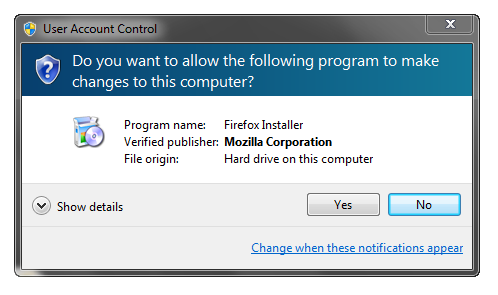
So here we are, from start (no cert) to finish (signing a .NET app). It only took about two days to go through the identity verification process, but the time was well worth it – and the rest is easy given the nice signing tools in Windows and Visual Studio.
We’ll be getting a certificate & private key through a trusted root certificate authority (CA) provider, not test signing or self-signing. If you’ve ever purchased an SSL certificate for your web servers, similar process.
For a list of current program members, see this download on the Microsoft site – there are hundreds of businesses and governments in the program.
Some corporate IT departments will have their own internal CA, so although those companies can sign apps for internal use, using them on machines without that CA cert installed will yield the un-trusted publisher dialog.
What is Authenticode?
Authenticode is the name for the code signing system on Windows. There are many tools from Microsoft that are core to code signing and ship in the Windows SDK.
Code signing certificates have an expiration date, but as long as a timestamp server is used when signing, signed apps can still be used and verified. Certificates can also be revoked if ever compromised.
For good measure, here’s a short Wikipedia page on code signing, and the MSDN document “Introduction to Code Signing”.
What code signing is not
Signing is only a way of proving that some person or company is who they say they are. It doesn’t tell you whether there’s a nice person, or in any way validate functionality of an app.
Also, .NET projects have a “Signing” tab, but this is actually a feature called Strong Naming, and is different. Most commercial software products using .NET will be both strong named, plus be code signed.
What all can you use your $99/year key for?
- Signing Windows executables
- .NET programs, class libraries, ClickOnce apps
- .MSI installer files
- Adobe AIR apps
- Java JARs
- Microsoft Office/VBA macros
- Mozilla objects and extensions
- Signing Visual Studio extension packages (.vsix files), although SignTool doesn’t directly support this (no SIP module)
Note that only Verisign offers code signing certificates for Windows device drivers through a special program for kernel-mode code signing.
How does Microsoft do code signing?
Obviously the Microsoft corporate keys are extremely secure and private. All signing is performed through a set of intricate systems that accept builds, check conditions, scan for viruses, and who knows what else… and eventually provide the signed binaries.
It’s pretty much a black box to us as engineers, but it works for hundreds of thousands of files.
As a dev, I’ve had more than my share of wild Friday nights trying to get code strong named and signed: there’s a big process and it revolves around a lot of people, smart cards, and it eventually works out.
Step-by-step guide to purchasing a certificate
Here’s my experience with getting a certificate. Different certification companies may have different processes, but in general you can be sure that you will need to do a lot to provide proof and authenticity of your name/company.
You can purchase a personal certificate (independent developer, professional geek) quicker than a corporate certificate given the different proof requirements.
Since the name/company name is what will be shown in the publisher field, you obviously wouldn’t want to get a personal certificate for company use. Also, be aware that the address you provide to a signing company will be embedded inside the certificate.
I purchased my code signing cert through K Software, which is an official reseller of Comodo certificates, a popular Level 2 CA whose certificates are part of the root CA program on computers everywhere. The certificate costs $99 per year. I’ve heard of other companies sometimes offering specials as low as $65 a year, and others such as Verisign asking $499 a year.
Since there is some pain in the process (producing copious amounts of evidence) and waiting for that to be validated, you may want to consider purchasing a multi-year certificate and skip having to renew yearly.
You must use Windows and either Internet Explorer or Firefox to make the initial request. After the entire process is complete and the certificate is issued (days later), you will need to use the same computer and browser to complete the process. You will then export the certificate and private key to a file so you can store it safely somewhere.
What proof will be required
This is a partial list, the authentication process may require other documents. Most verification can be done through fax, mail, or even email.
If you’ve ever purchased an SSL certificate, it’s almost the same exact process.
- Your own domain name:
- The domain’s WHOIS records must match the information you provide in your order.
- If you use Private Registration services, you’ll need proof from the private registration company that you own the domain and your address matches. This can be a pain.
- Articles of Incorporation
- Business License
- Other documentation such as DUNS details
- Driver’s license or passport
- Recent utility statements with matching data
- Phone statement with matching information, name, and phone number where final phone verification will be performed
This information will be asked for after you order and pay for the service. It is performed by the CA (Comodo in my case), not by the company or reseller you buy the service from.
For the remainder of this section, everything will be specific to Comodo. I found them helpful, quick and responsive, and professional, so I would definitely recommend their service. It is a great value when purchased through a reseller.
Step 1: Register with the CA to track your validation tickets and receive support
You’ll need to do this with an email address at your domain name. You register with the same email you’ll use in the next step.
If you don’t usually receive mail at your domain, you should be able to easily setup mail forwarding to your normal mail address. On a Windows server, SmarterMail Free sets up in minutes and is great for this.
Simply create an account at Comodo Support for this: https://support.comodo.com/index.php?_m=core&_a=register
Step 2: Submit basic data and purchase
Start at the K Software site, which is a reseller of Comodo’s: https://secure.ksoftware.net/code_signing.html
Current prices are $99 US for one year, $198 for 2 years, and so on.
After navigating to the page, click Buy Now. Internet Explorer will pop up a message that the site is attempting to perform a digital certificate operation. Click Yes.
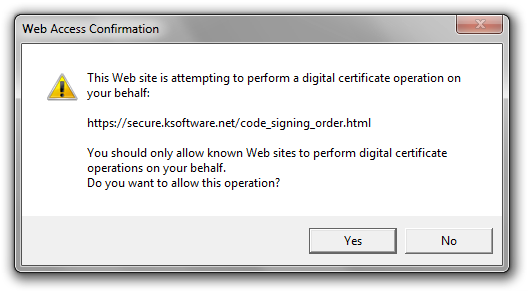
On the order form page, you will submit your details, including address, email, etc. The email address needs to be an email address on your domain name that can be verified, not a Hotmail or Google Mail address. Note that this information will be embedded inside the final issued certificate.
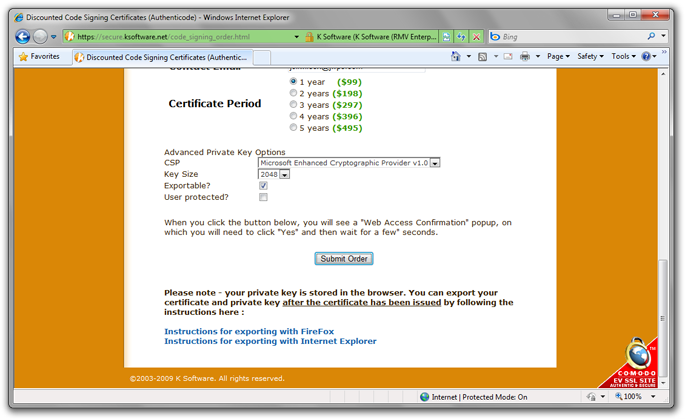
Important values at the end of the page:
- CSP should be Microsoft Enhanced Cryptographic Provider v1.0 (the default)
- Key size: 2048 is fine for most people
- Exportable: definitely – if you don’t check this, you can’t get a PKCS 12 (.pfx on Windows) file to use for signing, and would have to do all signing on that machine
- User protected: Leave this unchecked
After clicking Submit Order, you’ll go to a payment page. I used PayPal and was done in seconds.
Step Three: You’ll be contacted
At this point you’re done with the K Software order. You will be contacted via e-mail from Comodo, and they’ll step you through what verification they need at that time, and how to submit it.
In my case I had to go through several rounds of verification, including sending a recent phone bill.
I ran into some hiccups because the domain name I used for the e-mail address, though owned by me, is hard to prove: my WHOIS data all says ‘Domains By Proxy’, which is the provider of private registration services for GoDaddy. I had to find a way to provide proof that I own the domain.
The final verification step is when they eventually call your phone number. After that call, they’ll issue the certificate approval, and you’ll receive a final e-mail about 20 minutes later to go pick up the certs.
This step took me 1.5 business days including waiting time.
Step Four: Pick up your key
On the same computer you started the operation on, and same browser, click on the link provided in the e-mail Comodo sent when the key was ready.
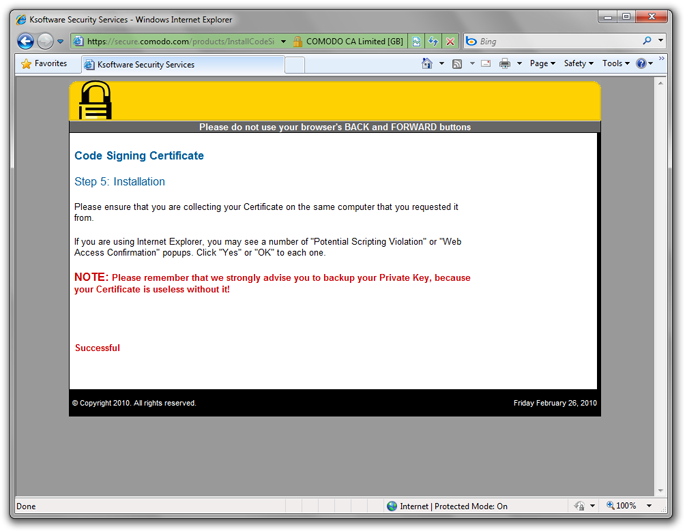
On this page, you’ll again receive a notification about a certificate operation. That’s fine. At this point you now have the key stored in your browser certificate system.
Step Five: Export your key
This step is for Internet Explorer users. If you’re using Mozilla Firefox, here’s some other instructions.
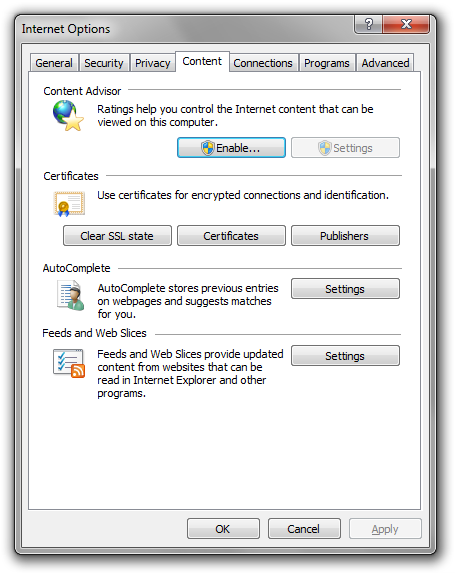
In IE now, click Tools | Internet Options. Click on the Content tab, and then the Certificates button:
Within the Personal (first) tab of the Certificates dialog, click on the new certificate issued by UTN-USERFirst-Object (this is one of the many Comodo level 2 CAs in the Windows root CA program):
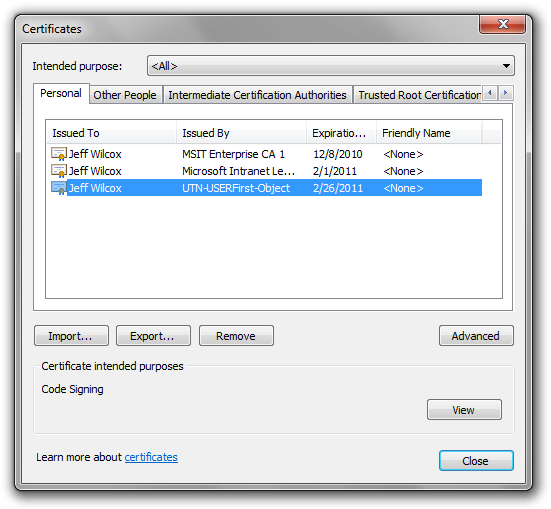
Then click ‘Export…’. In the Certificate Export Wizard, read the useless text and click Next.
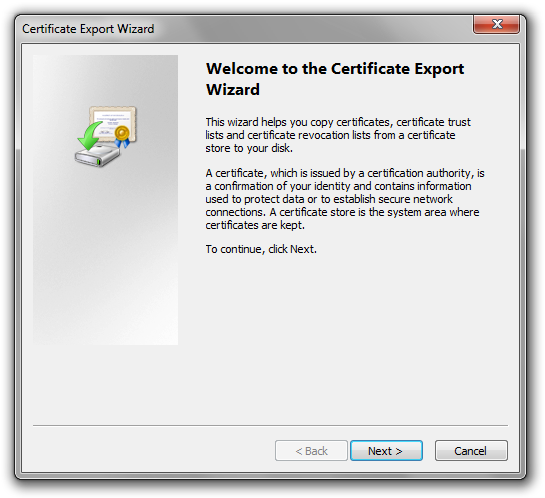
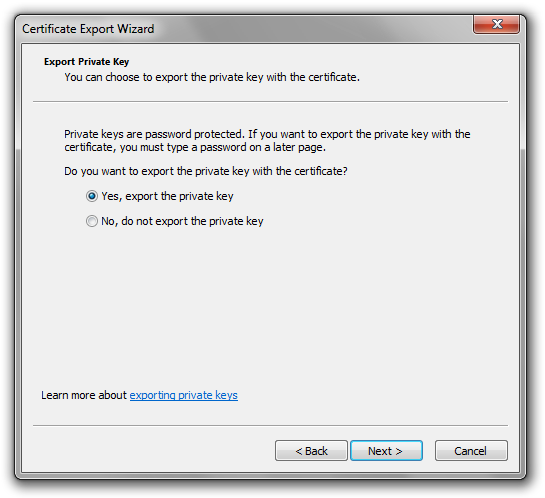
Select the option ‘Yes’ for exporting the private key along with the certificate.
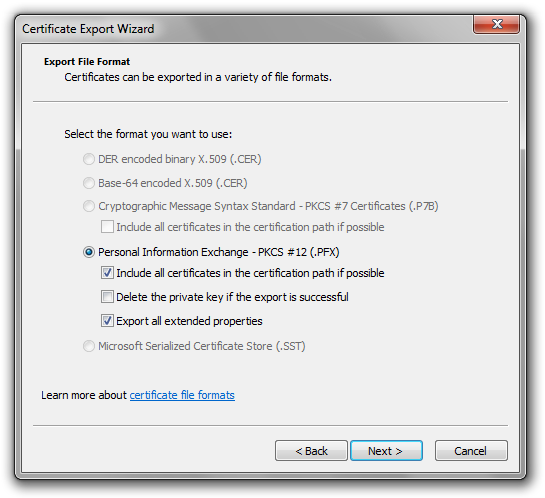
Next, you pick the file format. Only PFX/PKCS #12 should be available. I checked both ‘Include all certificates in the certification path if possible’ and ‘Export all extended properties’, though to be honest I haven’t a clue whether this is needed.
I wouldn’t recommend clicking the delete private key option, I like knowing that on this particular machine I can still re-export the cert as needed in the future.
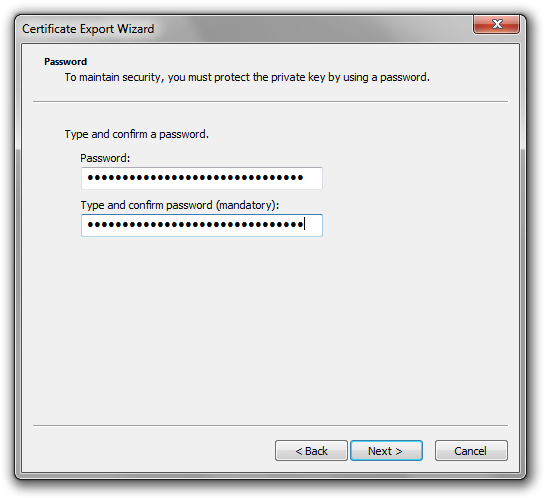
Now, come up with a password to protect the file. You will need to use this password when using tools such as SignTool.exe, or setting up an automated code signing process of your own.
Finally, pick where you want your .PFX file stored.
Step Six: Protect your key
Although code signing certificates have a mechanism through the CA to revoke keys, you do not ever want to have to do this.
Take precautions. It is your duty to protect your key. Many people find ways to store this information through smart card or other physical security mechanisms.
As an individual, it’s pretty easy for me: Only I know the password, I have the file securely stored, and I don’t need to worry about sharing it with others.
Business entities and groups will have more trouble coming up with the appropriate processes and systems for this. Ideally some sort of automated system should be used to perform the code signing, with alternative authentication; providing the key file and a password is not the best method.
Import Wizard Note
To manually sign on another machine, you’ll want to double-click on the .pfx file. An import wizard will open up that will allow you to install the cert and private key on your machine.
For manual signing you typically select from your private certificate store on the machine, instead of using the .pfx file directly. For automated signing, you probably will use the .pfx.
How to sign your apps and libraries
Now the fun part. Armed with your new code signing certificate and private key, you’re ready to go SignTool.exe’ing.
SignTool is included with the Windows 6.0 and 7.0A SDKs, and you’ll have it in your path if you have Visual Studio 2008 or 2010 installed and are using the associated Visual Studio Command Prompt.
You can create scripts to sign quickly using command line parameters, or even write .NET apps using types in the System.Security.Cryptography.X509Certificates namespace.
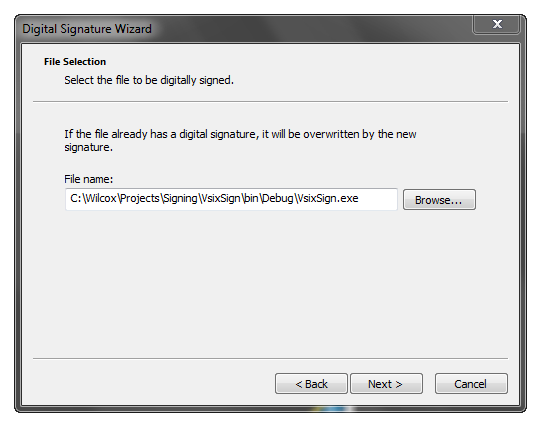
It’s easiest to get started by manually signing, using the Digital Signature Wizard. From a Visual Studio 2008 Command Prompt, for instance, run:
signtool.exe signwizard
This will popup the wizard that will walk you through.
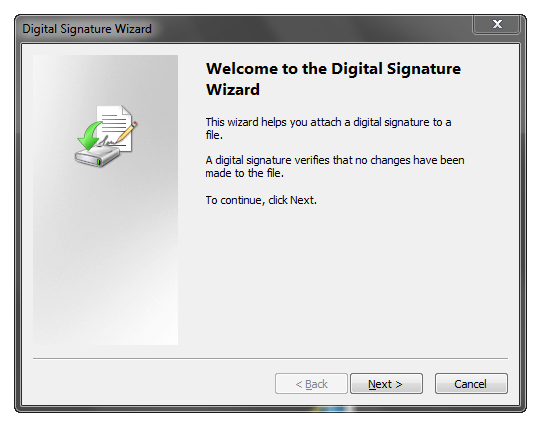
Select the file you want to sign:
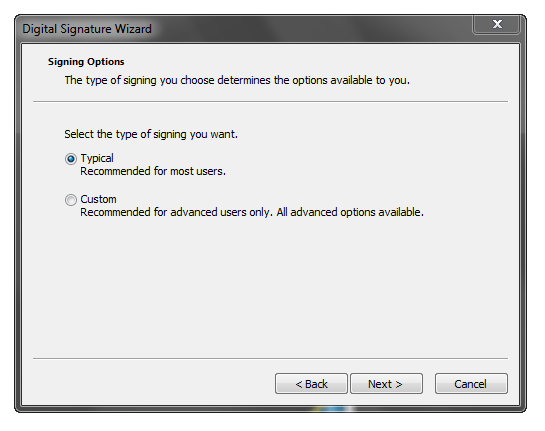
The ‘Typical’ option will let you pick from the certificate store on your machine. You don’t actually select the previously-exported .PFX file when manually signing.
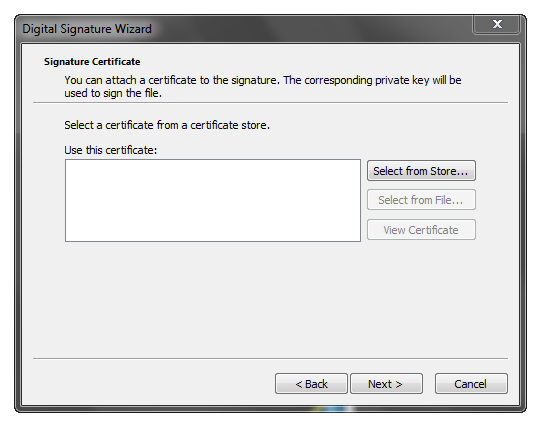
Here I click ‘Select from Store…’:
Which pops up a Windows dialog listing available code signing certificates.
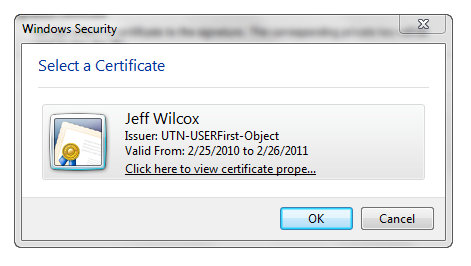
Here I can verify the goods:
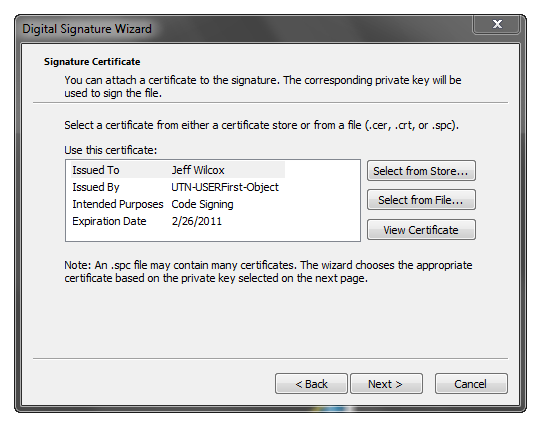
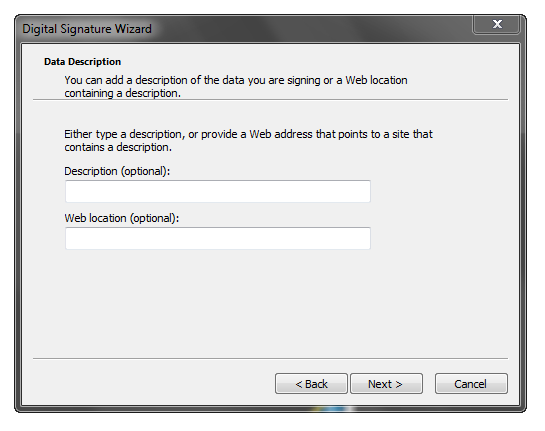
On the next wizard page, you can optionally offer more information here as appropriate.
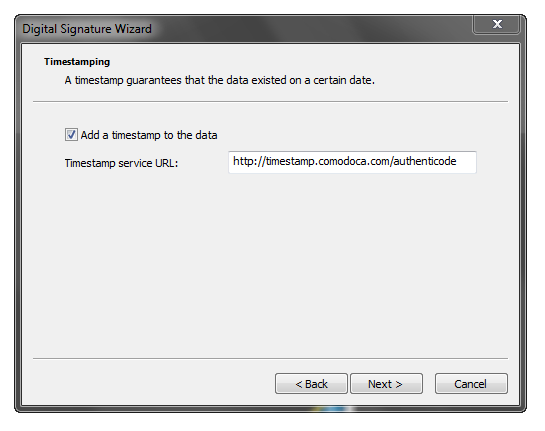
The last optional, but highly recommended step, is to use the timestamp server provided by the CA. This is a service that authenticates when the data (your app) was signed.
This means that your app will continue to be valid, even after the certificate expires, as long as the cert is not revoked.
For Comodo, their timestamping server is: http://timestamp.comodoca.com/authenticode
Click Next and you’ll see the summary of what signing is to take place.
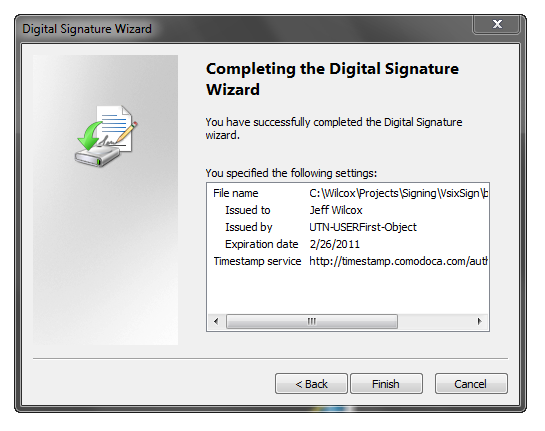
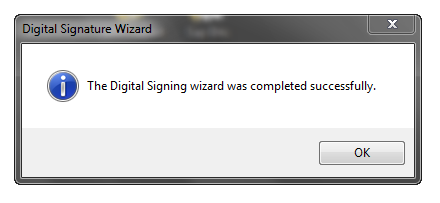
After clicking Finish, the dialog will go away, and pretty soon you should receive a success/failure message.
CodeSign.exe Parameters
You can also code sign in scripts and the command line using arguments. For instance, here’s a sample made-up signing argument list. You can specify any number of files to sign as the final arguments.
signtool.exe sign /f PathToKeysAndCert.Pfx /p “MySuperSecretPasswordToUseThePfxFile” /v /t http://timestamp.comodoca.com/authenticode “C:\MyFileToSign.exe”
For all the parameters, type ‘signtool sign /?’
That’s it!
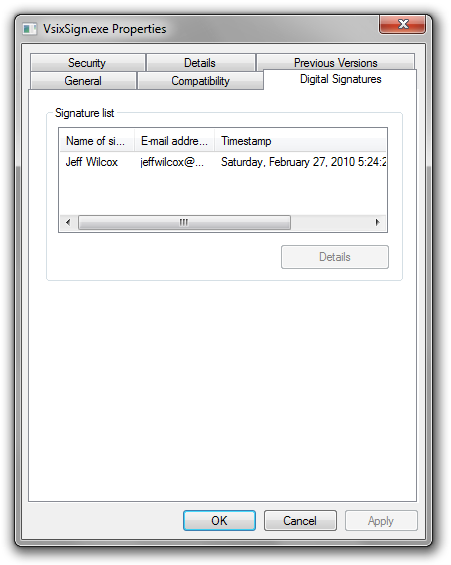
You can use a variety of tools to check that the signing works fine, including just examining the file in the Windows explorer.
Authenticode-signed executables, MSIs and libraries will have a ‘Digital Signatures’ tab in the properties window (though not irregular file types, such as Adobe AIR files).
Here’s the .exe I signed:
And that’s it! Ship it!
Your customers will have that extra level of confidence when using your application. At some point, the more more professional software developers and software companies code sign, the more likely customers will be able to make proper security decisions about their computers… and the real benefit of the crisp user account control user interface comes to light.
Hope this helps. Let me know how your experiences with code signing go.