Walkthrough: The power of the November 2009 Silverlight Toolkit testing tools
November 20, 2009
Code coverage note: this feature was unfortunately cut due to regressions in dependencies. Also, automated closing of the browser has issues in November and we are hoping to address in the future. Sorry for the troubles.
The November 2009 Silverlight Toolkit is essentially a tools and infrastructure release on top of the October 2009 release (where we first introduced Visual Studio 2010 support). It also adds a Silverlight 4 Beta version.
New infrastructure & test tools ship in the Silverlight Toolkit
There is a lot in the release that is joining publicly for the first time, based on some of the internal tools and utilities that we use in building and testing the Silverlight Toolkit, plus things we’d like to have as typical Silverlight developers.
These tools join in the Experimental quality band, and over the next few posts, I’ll dig into the details. This post is a literal walkthrough of how you could go about seeing all the utilities in the meantime.
One important thing to call out is that, as an initial release, there are definitely some rough edges: the test tools are centered around Microsoft Build (msbuild) integration, instead of Visual Studio integration; there’s no add-in or nice right-click project support to use these tools today.
We’ll be collecting feedback along the way and making changes in future releases. Until then, hopefully some of you will find the infrastructure useful, if only to peak behind the curtain. We’re also shipping the full source to these tools, you’ll find an Infrastructure.zip file inside the toolkit install folder.
What we’ll do in this walkthrough
This walkthrough uses Silverlight 4, though the instructions are virtually identical if you’re using Silverlight 3.
- Install the Silverlight Toolkit
- Create a new Silverlight class library with a simple business object
- Add a Silverlight Unit Test Application using the new templates found in the Silverlight Toolkit
- Run the tests in Visual Studio
- Run the tests from the command line in various browsers
- Collect block-level code coverage information for the build
This is screen-shot heavy, as future posts will dig into the details. I appreciate your patience!
Requirements:
- Latest Silverlight Toolkit
- For test automation:
- MSBuild on the machine
- Visual Studio 2010 Beta 2 Ultimate
Installing the tools
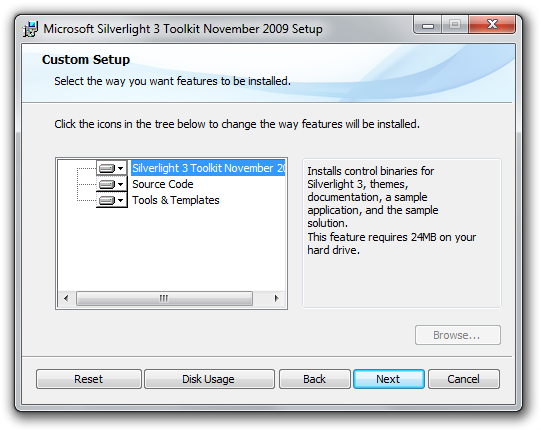
When you install either Silverlight Toolkit drop from November, you’ll see that there’s a new feature listed in the setup: the Tools & Templates feature. It’s selected by default, and adds Visual Studio templates, installs the tools, and prepares the tools if your machine has the proper dependencies on it.
Create a Silverlight Class Library
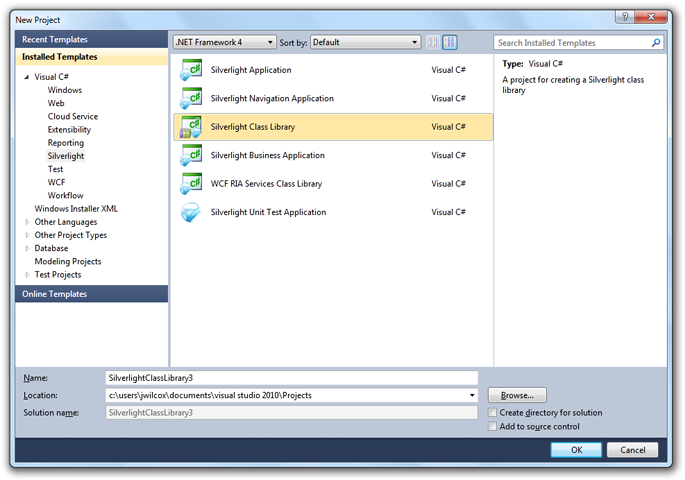
Open Visual Studio 2010 Beta 2, after installing the toolkit. Create a new Silverlight Class Library project, we’ll store a simple business object in it.
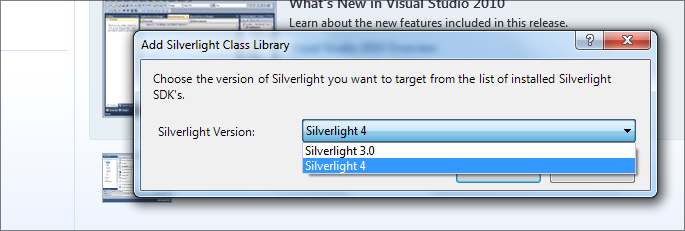
Whichever flavor of Silverlight you use, remember to use the same flavor while creating future projects in the same solution!
Create a new Person.cs type, with a few properties and a method. Here’s the source:
using System;


namespace MyApplication

{

    public class Person

    {

        public string First { get; set; }

        public string Last { get; set; }


        public string FullName { get { return First + " " + Last; } }


        public bool MightBe(string substring)

        {

            return FullName.Contains(substring);

        }

    }

}
Add a Silverlight Unit Test Application
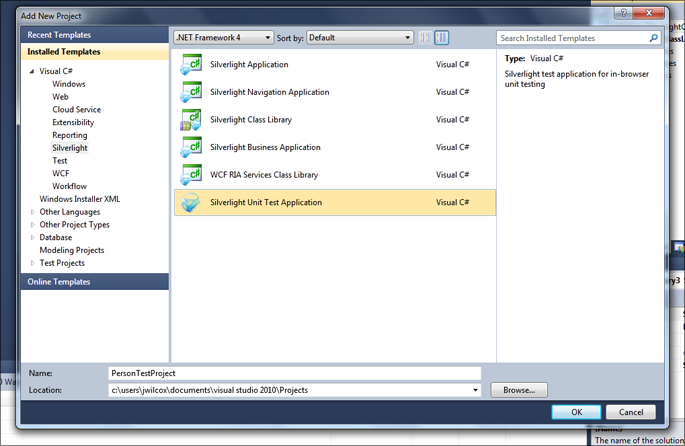
Right-click on the solution in the Solution Explorer and select Add New Project. Under the Visual C# (and also Visual Basic) languages node, select the Silverlight subgroup. You’ll see a Silverlight Unit Test Application project template.
You now have two projects:
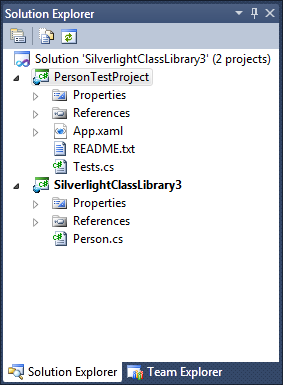
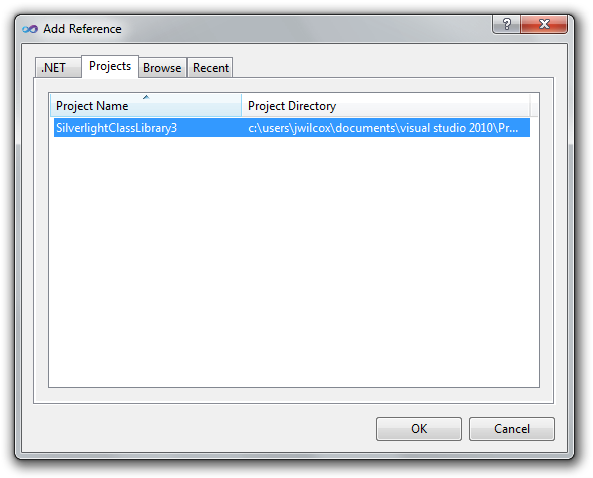
Next up, we want to add a reference to the class library, so that the unit tests can access the library. Right-click on the new test project and then select the Add Reference option. Under the Project tab, choose the class library you created earlier.
Now, let’s add some unit tests. Clear out the content in the created Tests.cs file and drop this in:
using Microsoft.VisualStudio.TestTools.UnitTesting;

using MyApplication;


namespace PersonTestProject {

    [TestClass]

    public class Tests

    {

        [TestMethod]

        public void TestCtor()

        {

            Person p = new Person();

        }


        [TestMethod]

        public void TestSetName()

        {

            Person p = new Person { First = "Scott", Last = "Guthrie" };

            Assert.AreNotEqual(p.First, p.Last);

        }


        [TestMethod]

        public void TestGetFullName()

        {

            Person p = new Person { First = "Steve", Last = "Ballmer" };

            StringAssert.Equals("Steve Ballmer", p.FullName);

        }

    }

}
The tests are pretty simple, and exercise various simple PMEs on the type.
Run the unit tests from Visual Studio
Right-click on the test project and select Set as StartUp Project from the menu. Then, press F5 or click the Run button to begin execution.
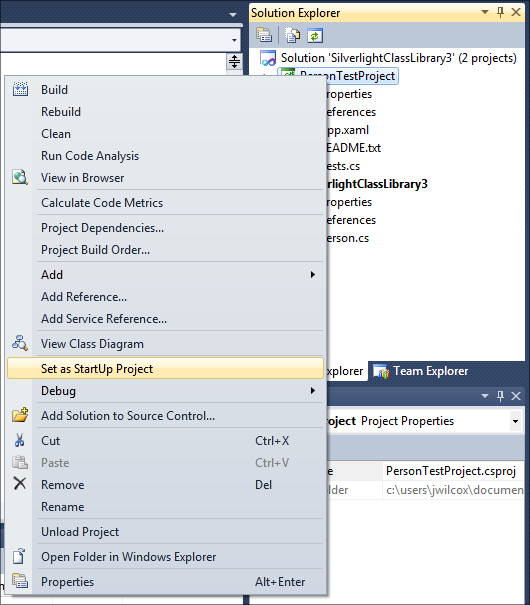
The default web browser will open up, the tests will run, and the window will stay open. When you are satisfied, close the browser. You’ve just run some simple tests!
Running unit tests from the Visual Studio command line
More interesting is being able to automate the tests: through MSBuild, we’ve added a task that can control the browser and save out the log file(s) from the unit tests when they run.
To do this, you need a few things:
- The Visual Studio command prompt open.
- The full path to the test project.
Open the command prompt
Personally, I always pin the Visual Studio 2008 tools command prompt next to my Visual Studio taskbar icons.

You can start it from the Start Menu, under the tools for the Visual Studio version you are using.
Alternatively, make sure MSBuild is in your path.
Or, start a command prompt and then move to your 32-bit Program Files, then ‘Visual Studio 9.0’, then VC. Run ‘vcvarsall.bat x86’
Note: all these command prompts should be 32-bit, even on a x64 machine. Silverlight is a 32-bit world today.
Move to the test project
To get the full path to the test project, I just right-click on the test project in Visual Studio, then Open Folder in Windows Explorer. I copy the path from the resulting Explorer dialog’s crumb navigation bar.
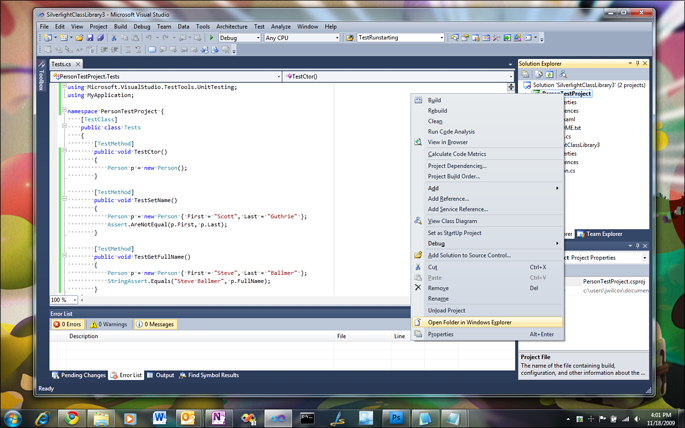
Now, inside the command prompt window, move to that path:
pushd (PASTE PATH HERE) <enter>
To run the unit tests in the default browser, simply type
msbuild /t:test
and press Enter.

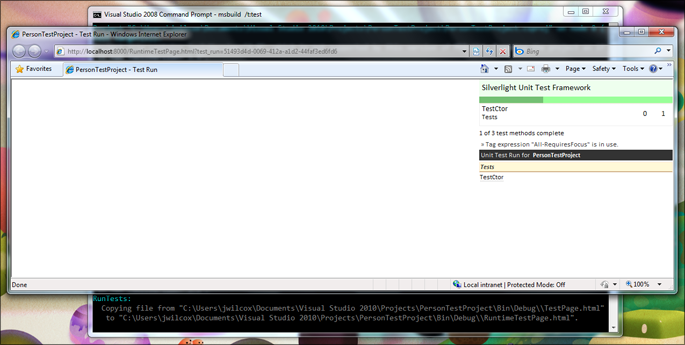
You’ll see the browser open, quickly run some tests, and then close. Here’s what it looks like, captured in the middle of the 5-second test run:
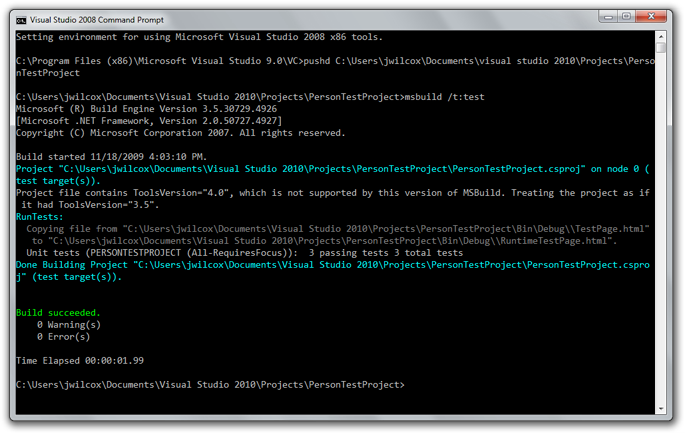
And afterwards, you’ll see that Msbuild reports success, and you can read the test to see that 3 passing tests were reported, out of 3 total tests.
Running tests in Google Chrome
It’s easy! Just set the browser property to Chrome.
msbuild /t:test /p:browser=chrome

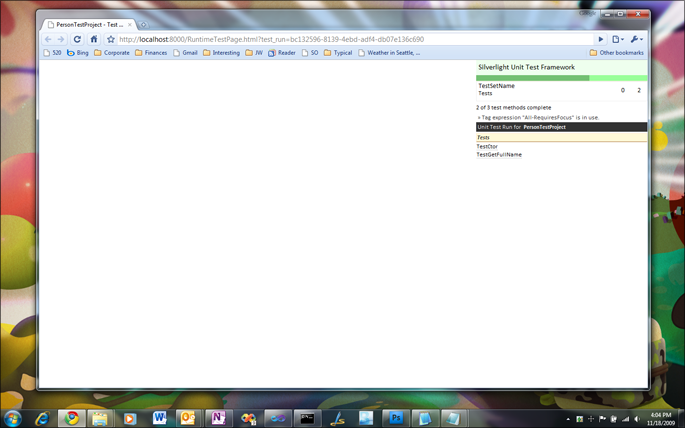
And just like that, Chrome opens up and runs the tests.
Running tests in Mozilla Firefox
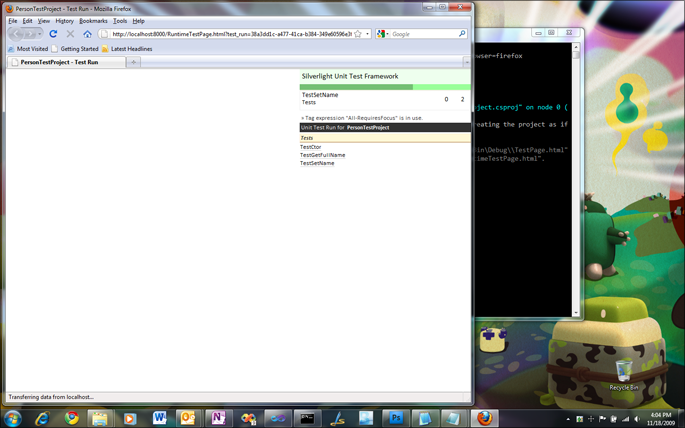
Just set the browser to Firefox.
msbuild /t:test /p:browser=firefox
Tag Expressions
A nice feature to help select a subset of tests is the Tag Expression syntax. By specifying a tag expression at the command prompt, you can include and exclude tests that are marked with the Tag attribute found in Microsoft.Silverlight.Testing.
Also, tags implicitly exist for all test method names, short and full.
So, let’s run the test called TestSetName from our project.
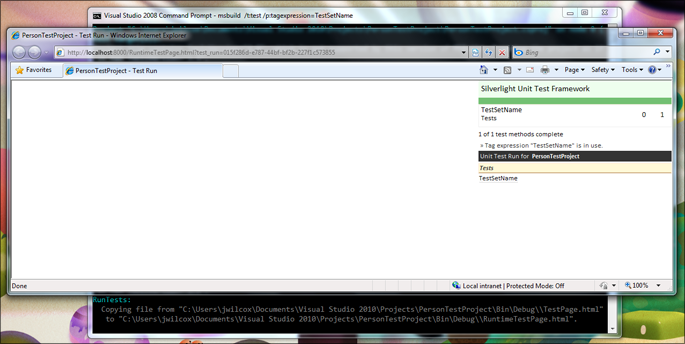
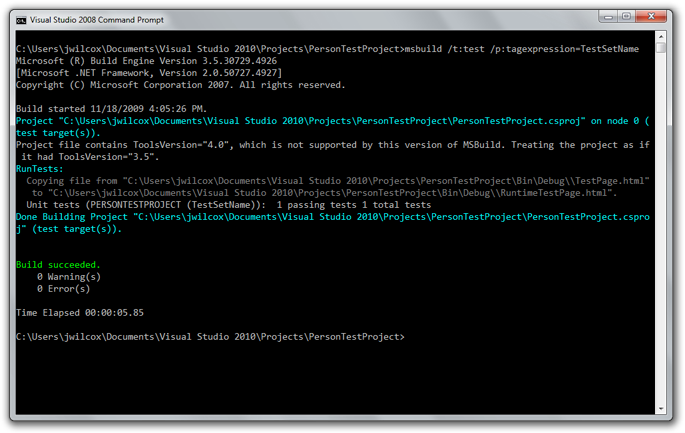
msbuild /t:test /p:tagexpression=TestSetName
You may briefly see indication in the test UI in the browser that a ‘Tag expression’ is in use.
And the build results show that just one test ran:
If you want to run all tests except that one, use this tag expression:
msbuild /t:test /p:tagexpression=!TestSetName
Cool, and easy!
Test results files
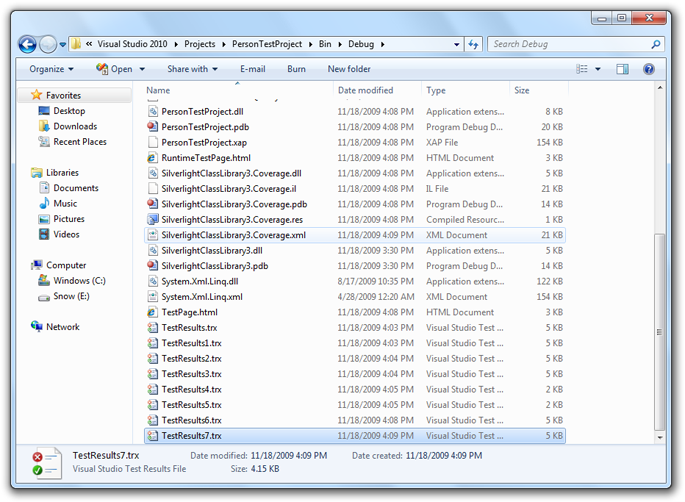
Another nice feature of running the tests through MSBuild is that you’ll see test result files (end in *.trx) inside the same folder as the test page for the application.
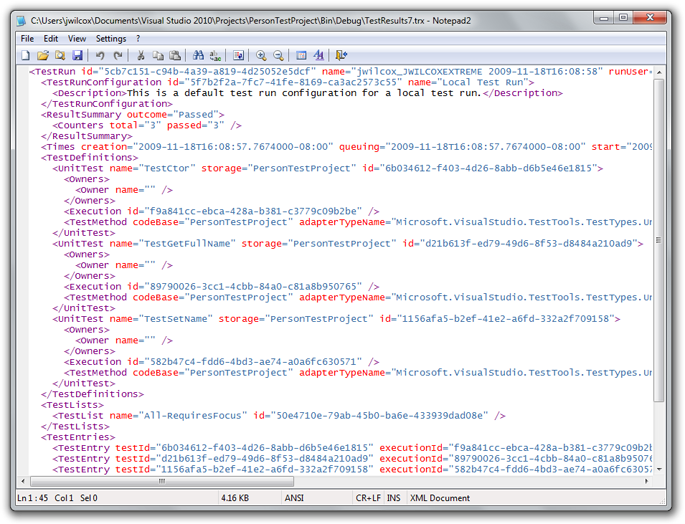
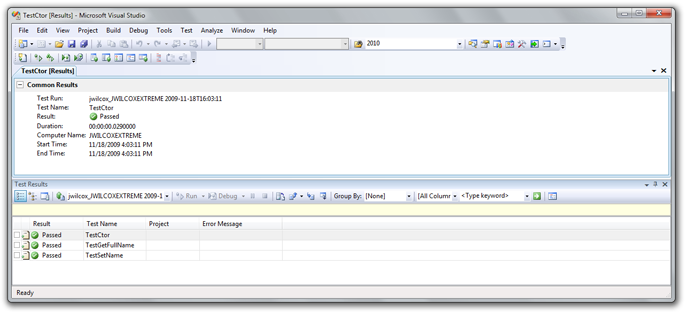
Similar and conformant to the Visual Studio *.trx format, you can parse and work with this data to understand execution times, results, and read other information. Unfortunately, you cannot open these files in Visual Studio 2010 Beta 2, but they do open in Visual Studio 2008. Note that there isn’t any real test integration with VS here: this is just an informative display.
Here’s a directory with several test result files (plus some coverage stuff we’ll get to later):
You can open up the TestResults trx file and see what kind of information is in it:
And here’s the results file opened in Visual Studio:
Preparing for Code Coverage
Ripe for a Visual Studio add-in, this process requires us modifying the test project’s .csproj file some. Instructions are the same for Visual Studio.
We need to manually select the assembly to be instrumented by setting a property. The assembly to be instrumented must not be signed, and not have a strong name. In this example, the assembly is SilverlightClassLibrary3.
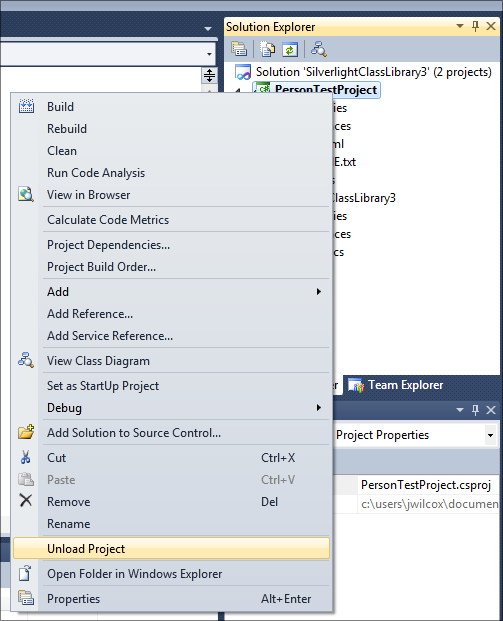
To make changes to the test project, to specify this, first unload the project by right-clicking on the test project and selecting the Unload option:
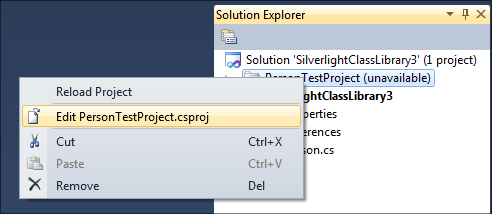
Then, right-click the project file that is ‘(unavailable) and select ‘Edit’.
Now you’ll see the XML data for the project. Scroll down in the template to where there is a commented out ItemGroup, and some comments about the code coverage support. Remove the comments from the ItemGroup:
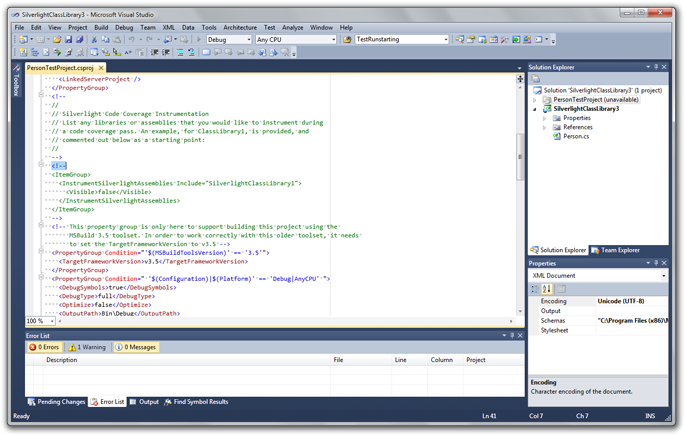
And now, change the Include statement from SilverlightClassLibrary1 to whatever your assembly to instrument is called. In our example here, it is called SilverlightClassLibrary3.
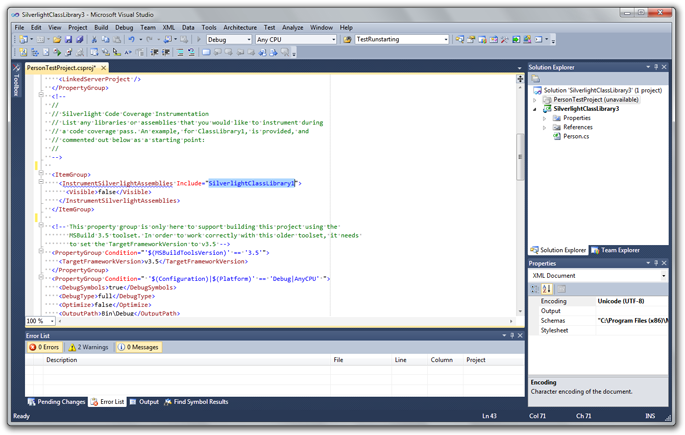
Now, that’s it. Let’s close the file and then right-click the project again and select Reload Project:
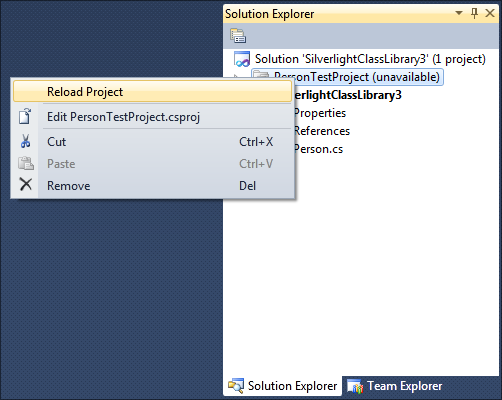
Now we’re ready to go!
Running Silverlight Code Coverage
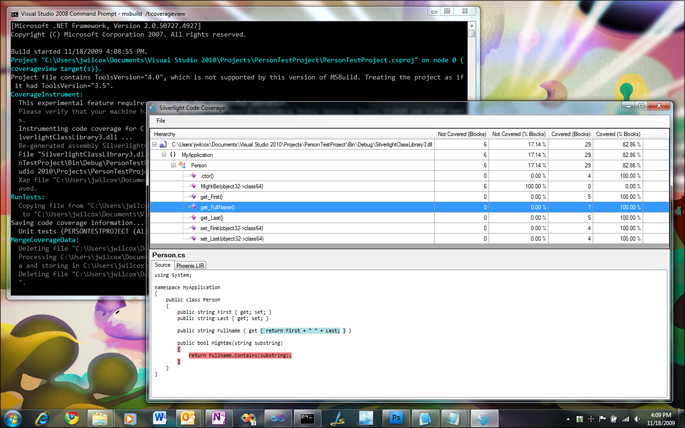
Just like the msbuild /t:test from above, we have a similar target named CoverageTest and CoverageView. CoverageTest collects the data, while CoverageView collects the coverage data and then shows the results in an application that explores the hit and not hit portions of your source code.
Let’s collect coverage!
Note: This is assuming that you have a high-level SKU of Visual Studio 2010 Beta 2 installed. The coverage tools depend on the Static Analysis Tools that ship in the beta. You will receive an error if you run this on a machine without those tools. We’ll look for a better experience in the future.
Remember, the same properties from above – browser and tag expression – still can apply and work in the coverage targets.
msbuild /t:coveragetest
Here is what it will look like if everything line up. Unfortunately, the coverage experience is a very early preview and very flaky in some situations due to the dependency on beta components. We also haven’t had I admit enough time to iron out all the issues customers may experience.
You see the Instrumentation messages come out, then the RunTests target, then the coverage data is merged and things should be successful.
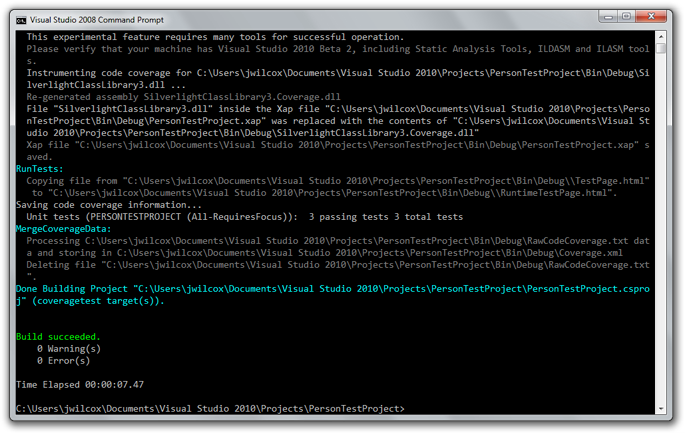
If that worked, it is safe to assume that the view target will also work. It will re-run all the tests and instrument again as well.
msbuild /t:coverageview
Now you’ll see the viewer popup, that lets you drill into types and methods to see what is hit (cyan) or not hit (red), to spot code that your tests are missing:
You’ll find a Coverage.xml file in the same directory where the test results go. This is the data that is used by the viewer application. You’ll see in the XML file a set of ‘visited’ blocks, and other information, in the file:
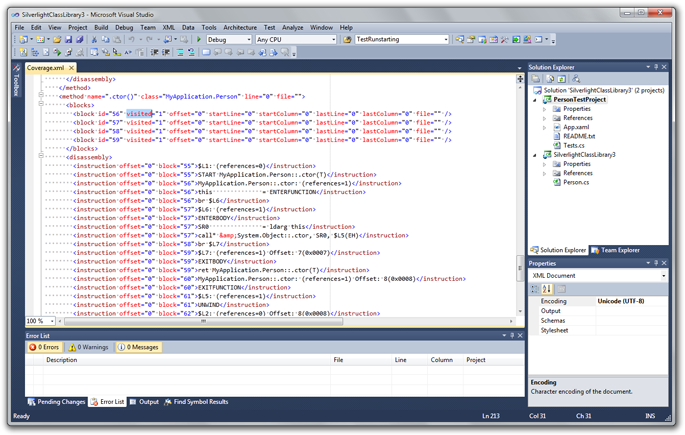
More to come soon!
Download the Silverlight Toolkit November 2009 Release Today
The Silverlight Toolkit is a collection of Silverlight controls, components and utilities that help make Silverlight development a little easier, more fun, and add value outside the regular Silverlight release cycle.
The sixth release of the Silverlight Toolkit, the November 2009 release targets Silverlight 3. There is also a release available that targets the new Silverlight 4 Beta for developers.
Resources of note:
- Learn more about the Silverlight Toolkit
- Download the November 2009 Release
- Get started with Silverlight development
- Participate in the controls community at Silverlight.net
- Check out questions and answers on Stack Overflow using the ‘silverlight-toolkit’ tag
- The Issue Tracker can be used to report issues, add to the feature wish list, and vote on the work to be done by the Microsoft team
Hope you enjoy our new release!
![Toolkit32[2][2][2] Toolkit32[2][2][2]](http://waz.blob.core.windows.net/wordpress/2009/11/Toolkit32222.png)